In this article, we will explain the process involved in installing active directory on Windows server 2012.
I am installing Active Directory on windows server 2012
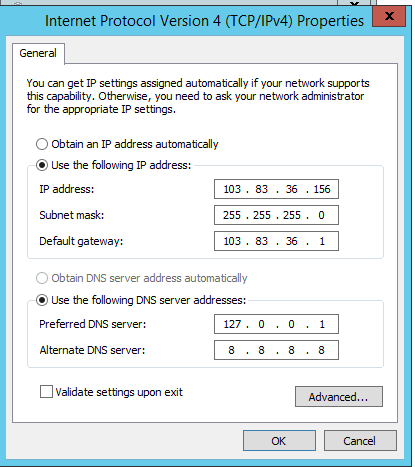
First, set network interfaces configured.
The server will act as DNS server field you can use local host address 127.0.0.0

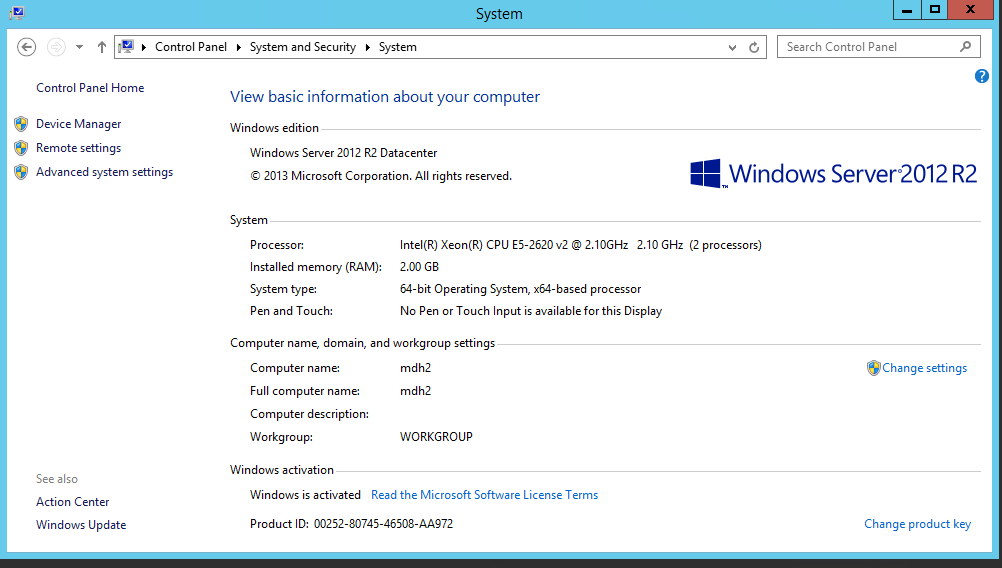
It is recommended meaning full name “MDH2”

Now ready to start on the Active Directory install.
I can start DNS role install
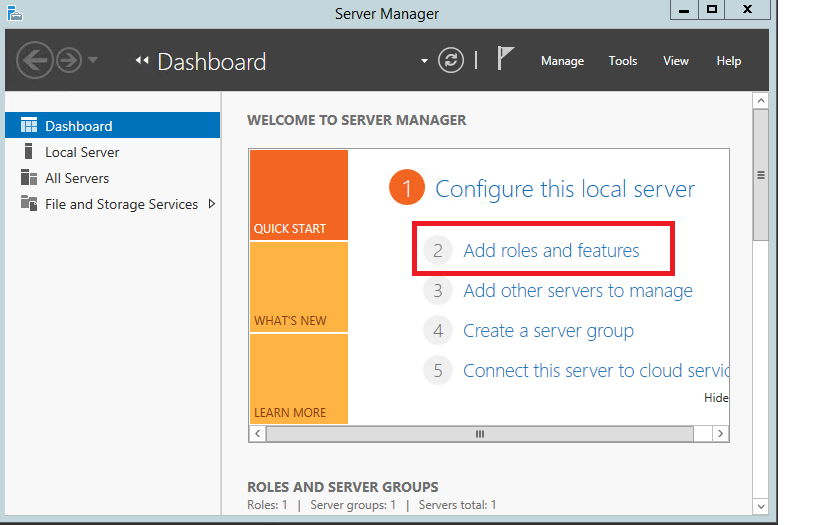
To do this we need to start "Server Manager" it can open using the shortcut on taskbar > > Server Manager >> Then click on “Add roles and Features”.

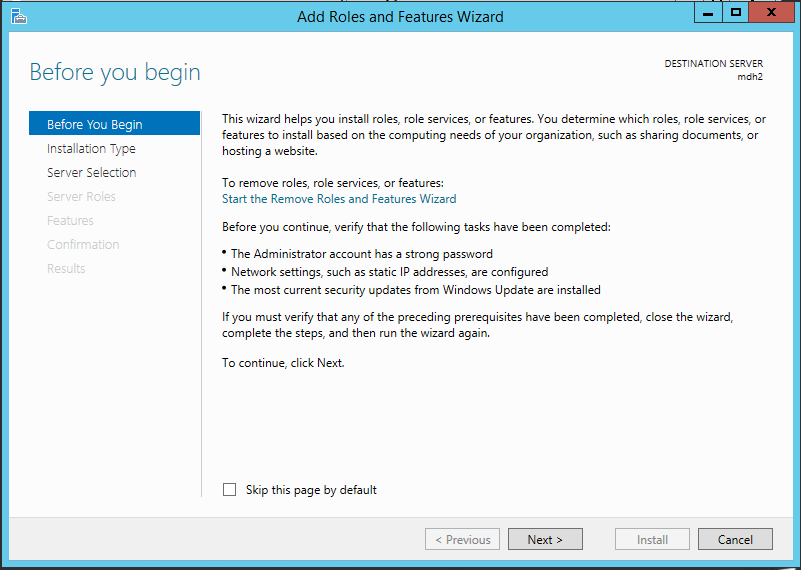
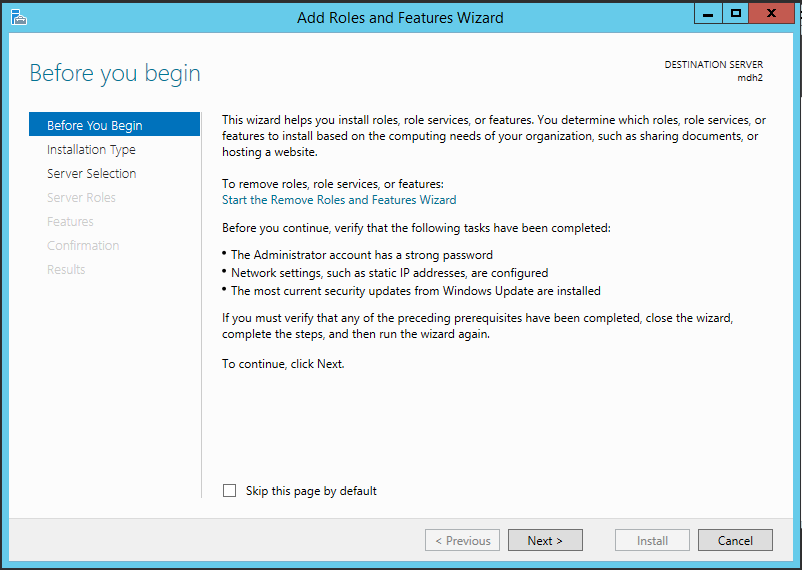
Then “ADD Roles and Features Wizard” come, Click on next to continue

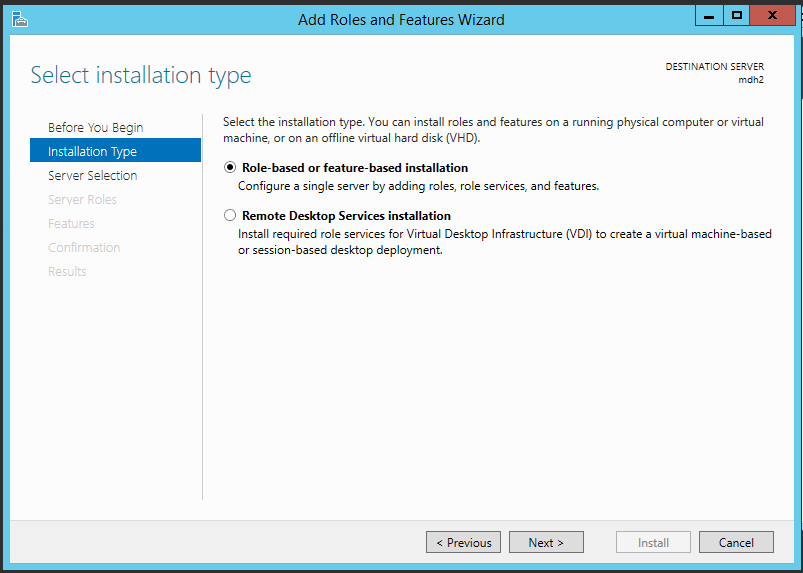
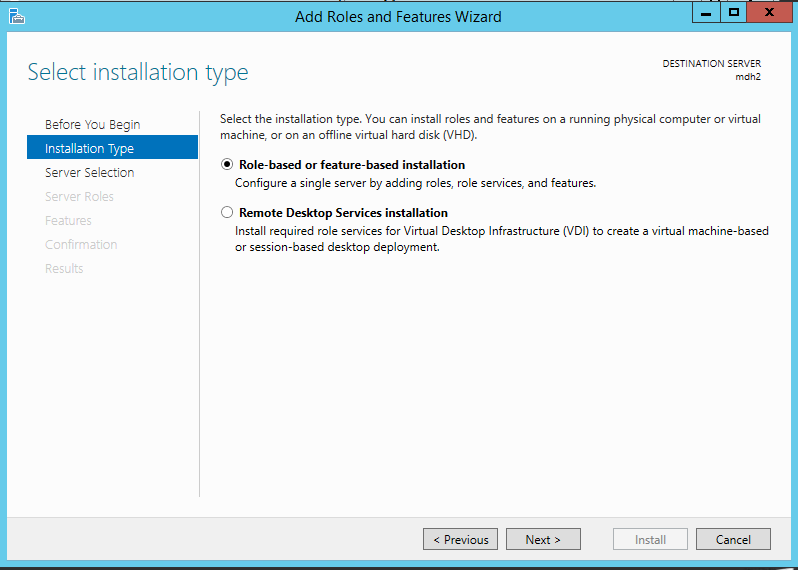
Next window default "Role-based or feature-based installation" click on next.
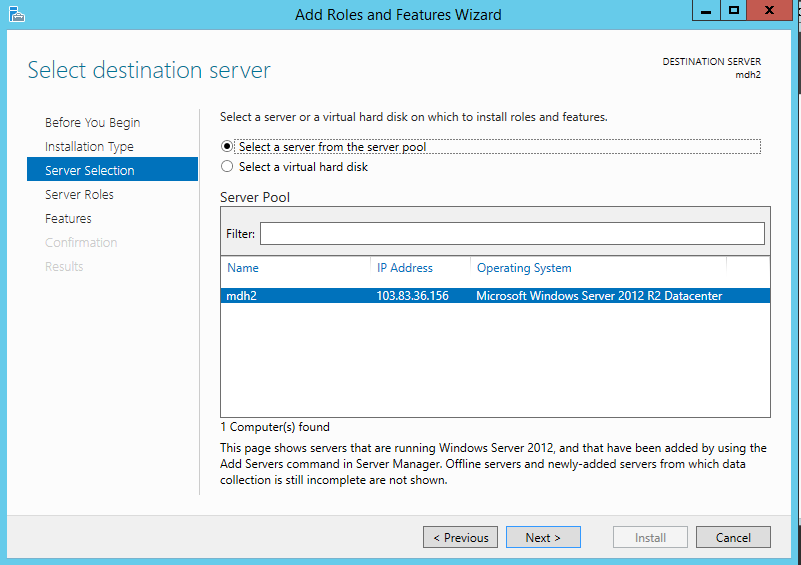
In below image window, we can select which server to install role. in our case it will be local. The default selection and click on next.

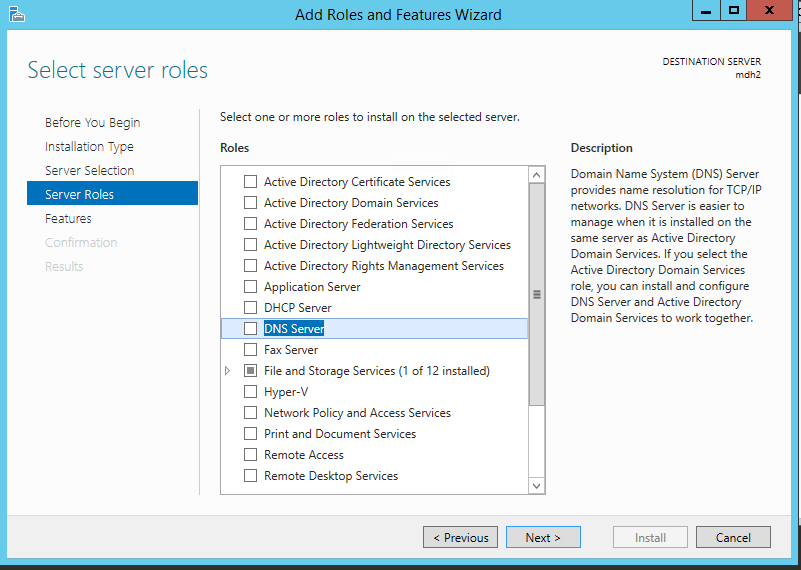
In the below image window give the option to select the roles. select the "DNS Server" and click on the checkbox.

In the blow image window. Click on next to continue
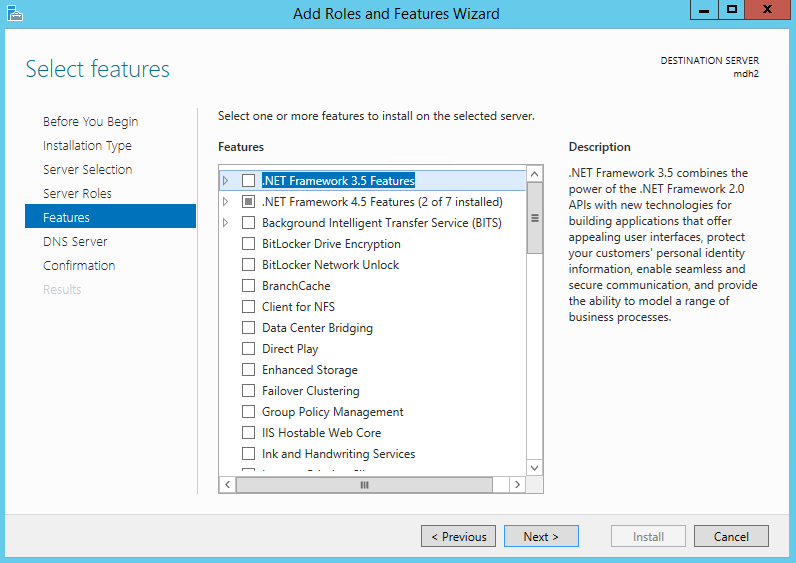
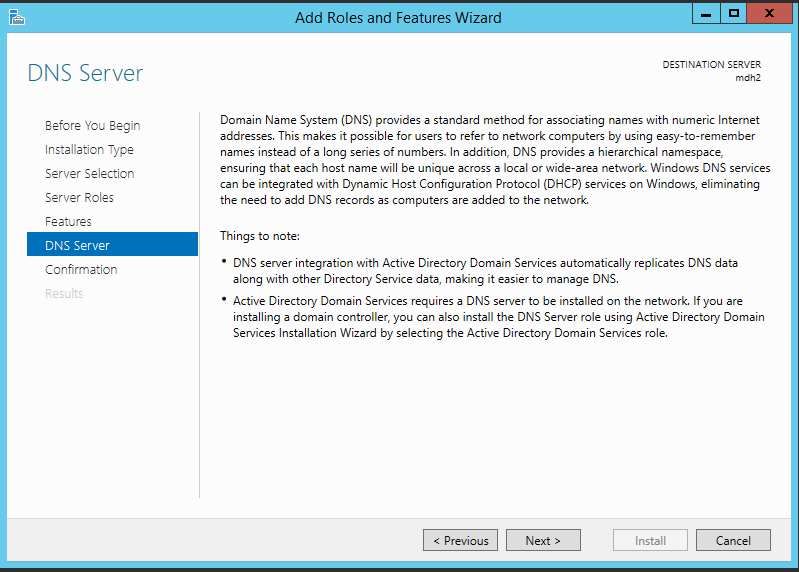
In the blow image windows Showing introduction of DNS role, Click on next to continue.
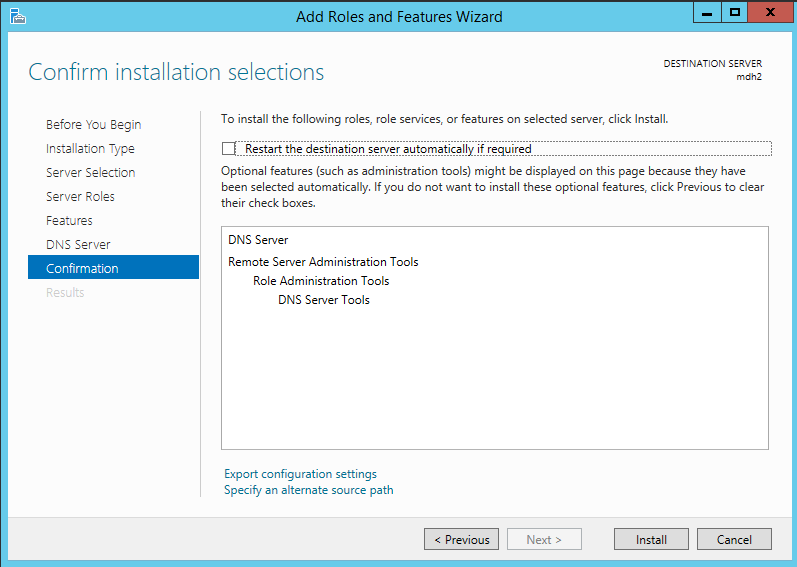
In the below image window it will Showing details about the selected features and click on "Install" then begin installation
Then it will begin the installation and we need to wait till it completes click on close

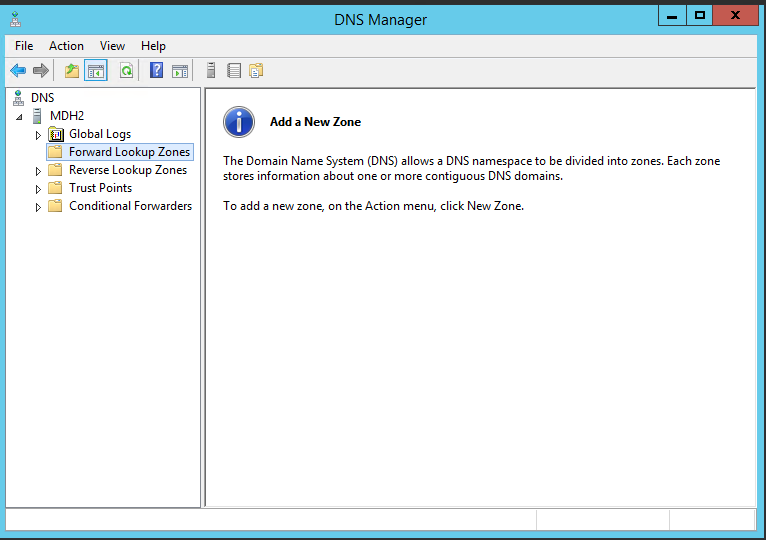
Now you can access DNS server using server manager >> tools >> DNS


Now all thins ready for Active Directory installation .Click on server manager >> Add roles and Features.

In the below image just click on next
In the below image Default selection and click on next.
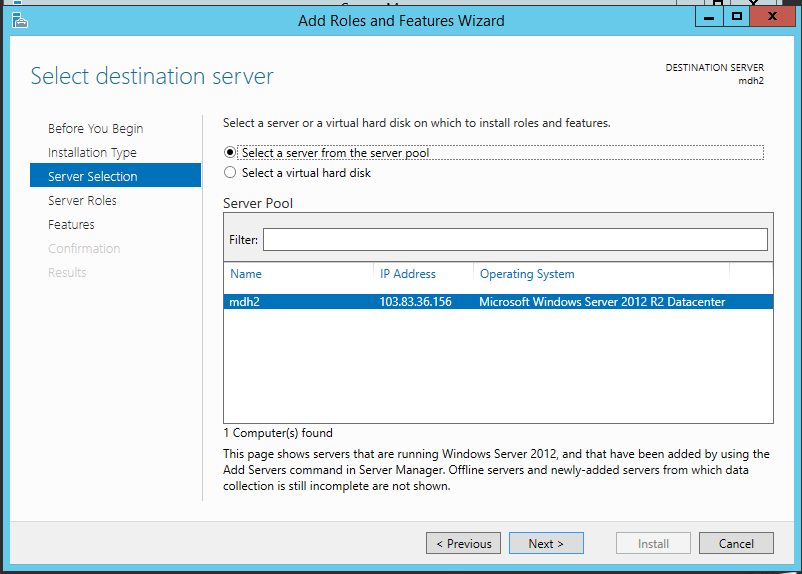
In the below image, I can select which server to install role. in our case it will be local. so, keep the default selection and click on next.

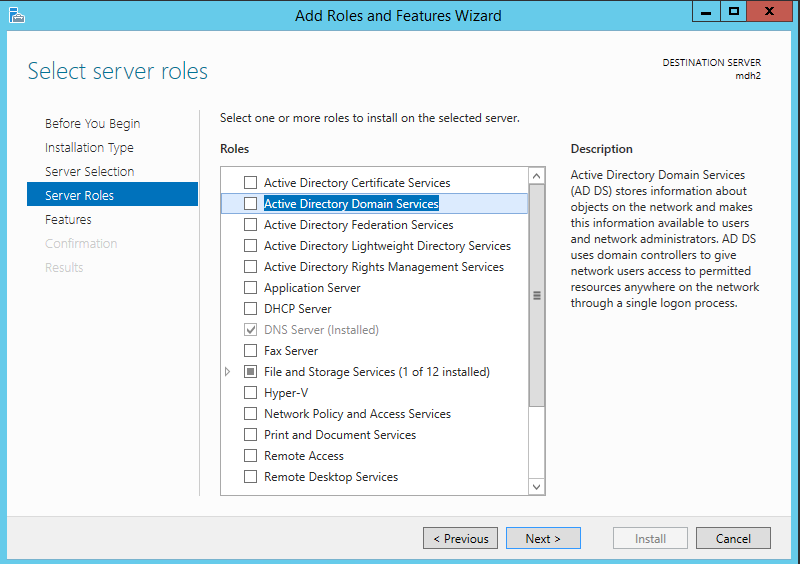
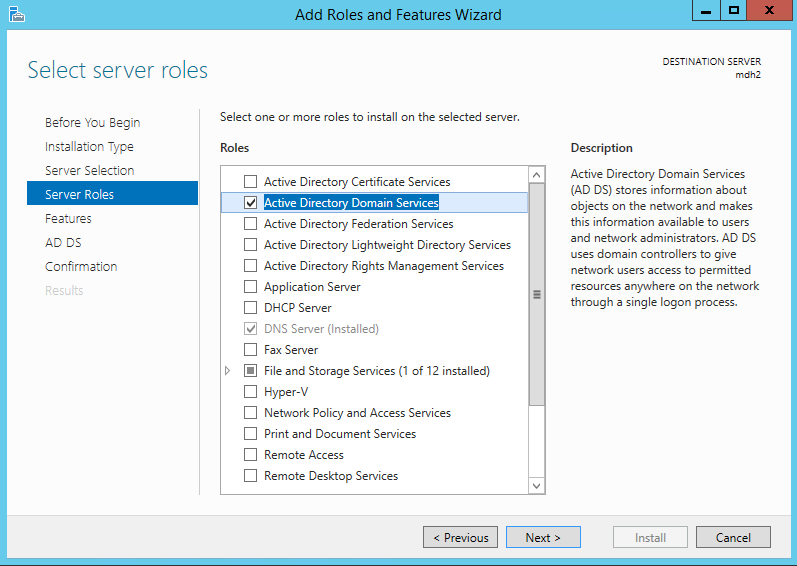
In the below image windows Showing options to select the “server Roles”.Select “Active Directory Domain Services”.

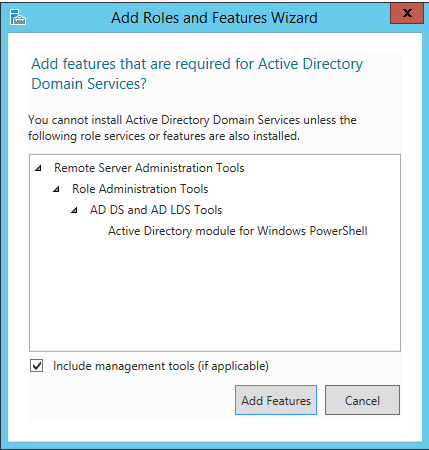
Then it will prompt window to indicate the additional feature installations related to selected role. click on "Add Features" to continue

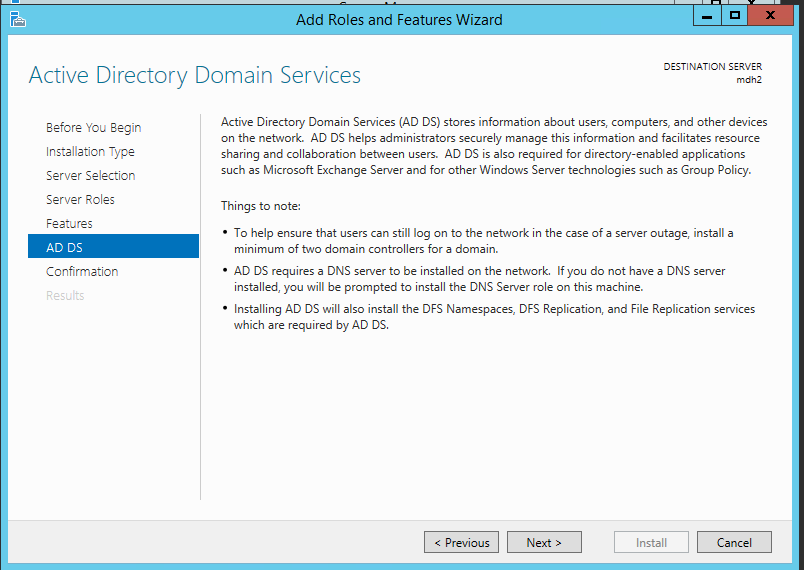
Then in next window click on next to continue.

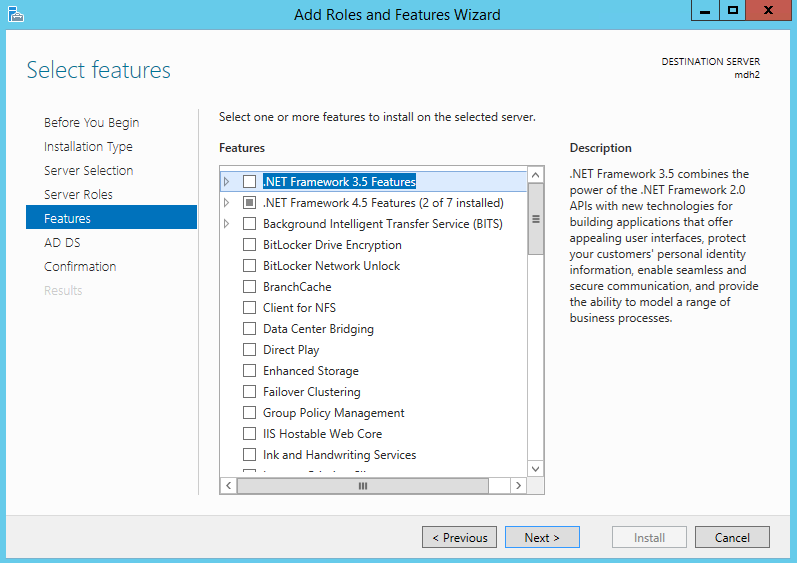
Next window click on next
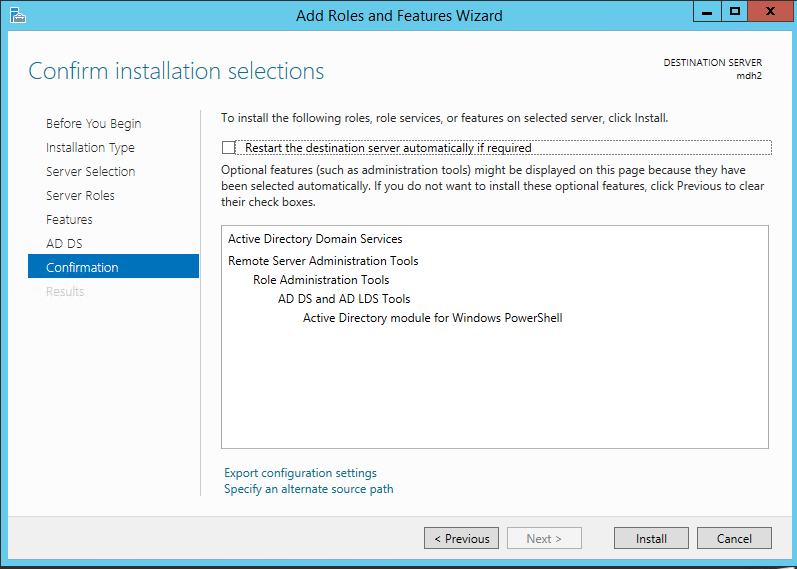
In the below image window click on “install” to start thein stallatuion.

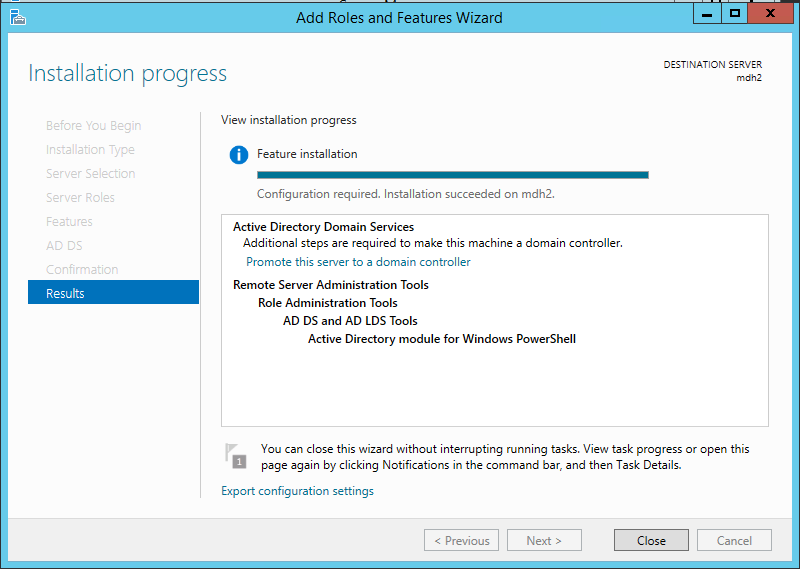
In the below image window it will begins the service install and we have to wait till it finish.Once it finish click on "close" to exit from the wizard. then next step is to reboot the server to complete the installation.

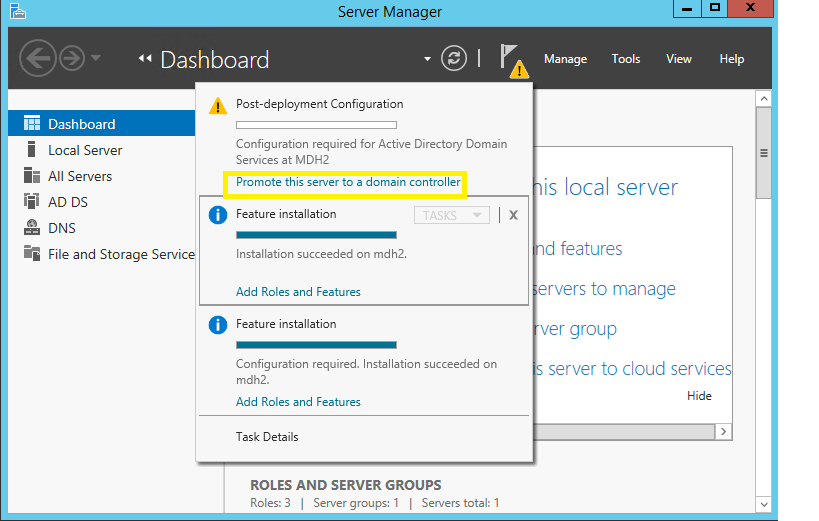
After that completes we need to start on the DC setup. to start that open the "Server Manager" and click Task flag. Then it Showing option as below picture. click on "promote this server to a Domain Controller" option .
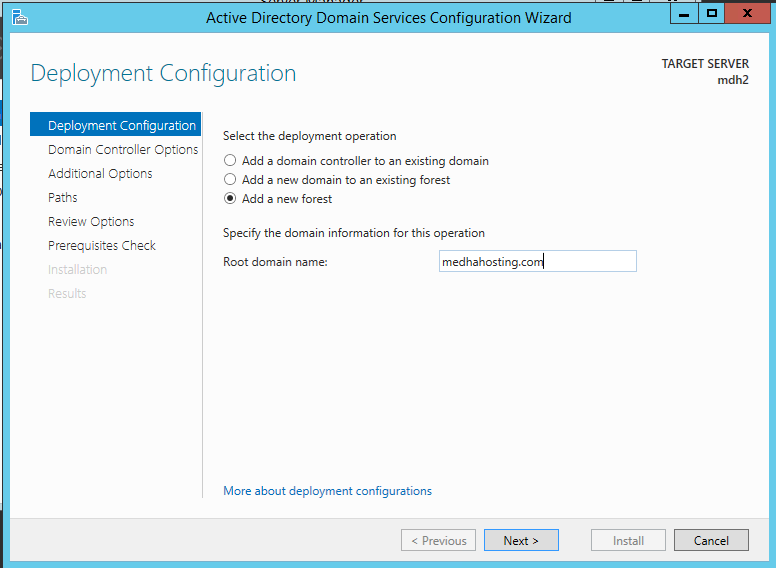
Then it starts the DCPROMO wizard. on the first window since its going to be new forest i have selected option "Add a new forest" and i typed the domain name "medhahosting.com.com" which i will be using on the forest. once fill the info click on "next" to continue.

In next window we can select the forest and domain functional levels. i will keep it default. then in domain controller capabilities its by default selected DNS server and Global Catalog as its first DC in the forest. then we need to defined password to use in DC recovery. click on next to continue.

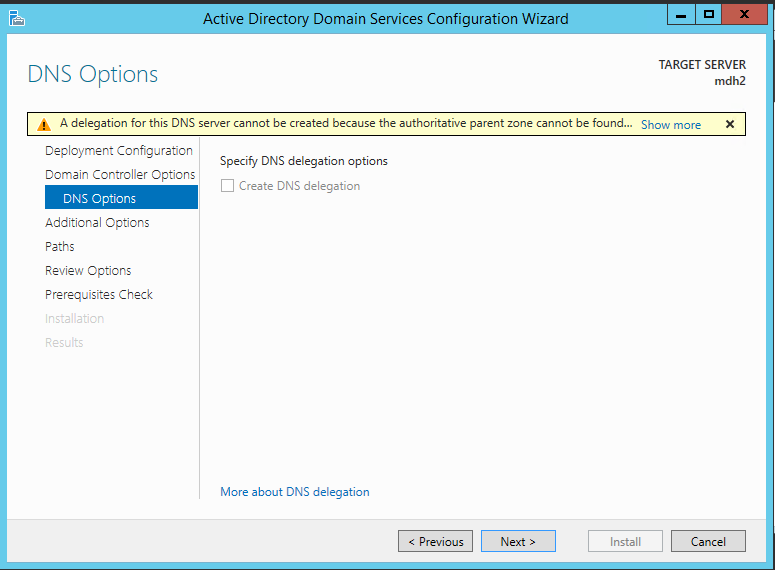
In next window it will give following error but it can be ignore. click on next to continue.
In next window it ask for the netbios name. we can keep it default and click on next to continue.

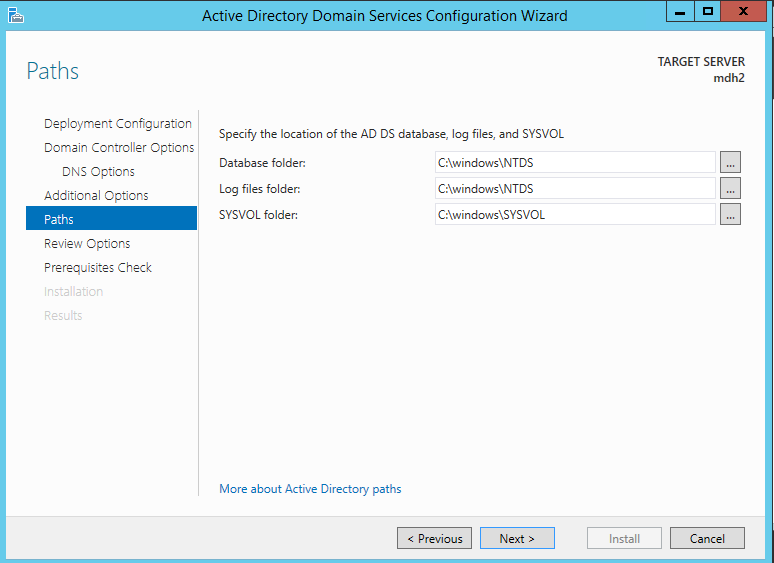
In next window it give option to change file paths for AD database, log files and SYSVOL files. we can change the paths or keep them defaults. once changes are done click on next to continue.

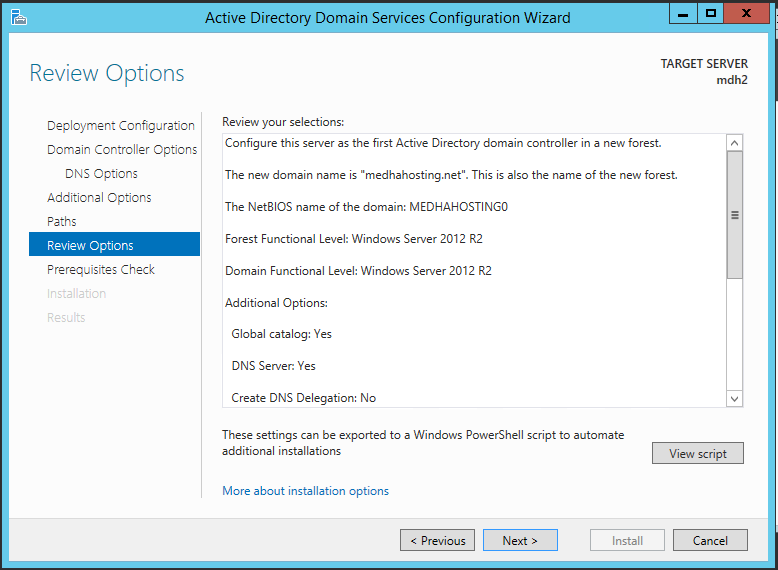
In next window it gives description about the installation. click on next to continue.
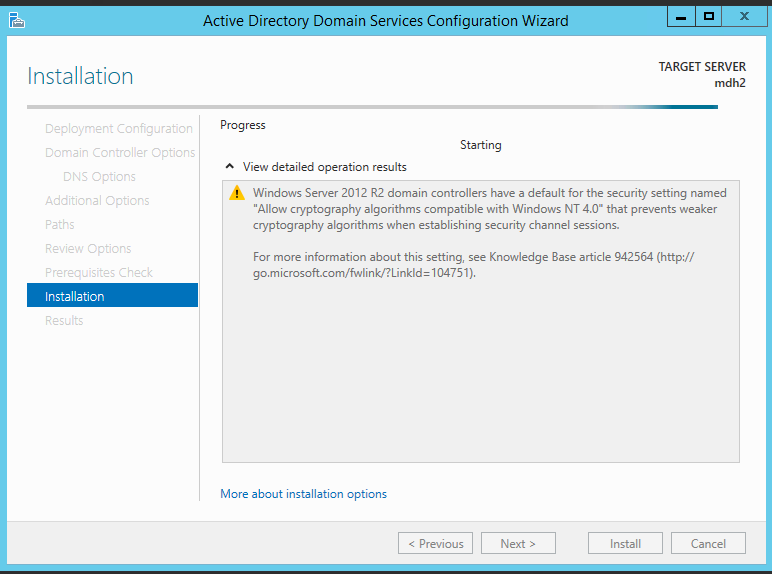
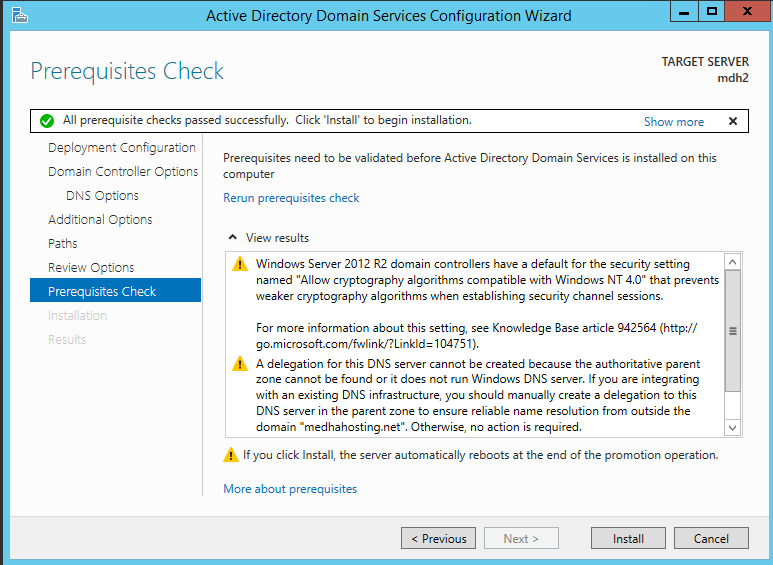
In next window it will run system check and verify system is compatible with the selected installation. once test completes successfully click on install button to begin the installation. if its passes any critical errors those needs to be address before the installation begin.

then it will start the install and we need to wait till it finishes.
Once its complete the install it will automatically reboot the server.
Once server is rebooted log in to server using domain admin credentials.
user : medhahosting\Administrator
password : XXXXXXXXX
Once login, load the "Server manager" and click on "AD DS" option in right hand list. then select and right click as showed in screenshot to start with AD configuration.

Now we successfully completed with the DC setup on server 2012 R2. if you have any issue about the steps feel free to contact me on reddybr@medhahosting.com
Installing active directory step by step on windows server 2012
I am installing Active Directory on windows server 2012
First thing I need to do is set network interfaces configured.
The server will be act as DNS server field you can use local host address 127.0.0.0
It is recommended meaning full name “MDH2”
Now ready to start on the Active Directory install.
I can start DNS role install
To do this we need to start "Server Manager" it can open using shortcut on task bar > > Server Manager >> Then click on “Add roles and Features” .
Then “ADD Roles and Features Wizard” come, Click on next to continue
Next window default "Role-based or feature-based installation" click on next.

In below image window, we can select which server to install role. in our case it will be local. The default selection and click on next.
In the below image window give option to select the roles. select the "DNS Server" and click on checkbox.
In the blow image window. Click on next to continue

In the blow image windows Showing introduction of DNS role, Click on next to continue.

In the below image window it will Showing details about the selected features and click on "Install" then begin installation

Then it will begin the installation and we need to wait till it completes click on close

Now you can access DNS server using server manager >> tools >> DNS

Now all thins ready for Active Directory installation .Click on server manager >> Add roles and Features.

In the below image just click on next

In the below image Default selection and click on next.

In the below image, I can select which server to install role. in our case it will be local. so, keep the default selection and click on next.
In the below image windows Showing options to select the “server Roles”.Select “Active Directory Domain Services”.
Then it will prompt window to indicate the additional feature installations related to selected role. click on "Add Features" to continue
Then in next window click on next to continue.
Next window click on next


In the below image window click on “install” to start thein stallatuion.
In the below image window it will begins the service install and we have to wait till it finish.Once it finish click on "close" to exit from the wizard. then next step is to reboot the server to complete the installation.
After that completes we need to start on the DC setup. to start that open the "Server Manager" and click Task flag. Then it Showing option as below picture. click on "promote this server to a Domain Controller" option .

Then it starts the DCPROMO wizard. on the first window since its going to be new forest i have selected option "Add a new forest" and i typed the domain name "medhahosting.com.com" which i will be using on the forest. once fill the info click on "next" to continue.
In next window we can select the forest and domain functional levels. i will keep it default. then in domain controller capabilities its by default selected DNS server and Global Catalog as its first DC in the forest. then we need to defined password to use in DC recovery. click on next to continue.

In next window it will give following error but it can be ignore. click on next to continue.

In next window it ask for the netbios name. we can keep it default and click on next to continue.

In next window it give option to change file paths for AD database, log files and SYSVOL files. we can change the paths or keep them defaults. once changes are done click on next to continue.
In next window it gives description about the installation. click on next to continue.

In next window it will run system check and verify system is compatible with the selected installation. once test completes successfully click on install button to begin the installation. if its passes any critical errors those needs to be address before the installation begin.
then it will start the install and we need to wait till it finishes.

Once it completes the install it will automatically reboot the server.
Once the server is rebooted log in to server using domain admin credentials.
Read why should you migrate to Office 365 here
user : medhahosting\Administrator
password : XXXXXXXXX
Once login, load the "Server Manager" and click on "AD DS" option in right hand list. then select and right-click as shown in the screenshot to start with AD configuration.

Now we successfully completed the DC setup on server 2012 R2. if you have any issue about the steps feel free to contact me on reddybr@medhahosting.com
Hope you understand the process of installing active directory on windows 2012. Please feel free to reach out if you need more support on anything about windows server.
Medha Hosting is helping businesses to manage their windows servers since last five years. Our professional windows engineers are well versed with Windows servers and its administration. If you need any help regarding your Windows server and managing your server cluster reach us, we are available 24/7 for you.